Wednesday, January 12, 2011

Kerfing for the Back

Finished up cutting the rest of the wood for the mortise (with a fretsaw). I also finished sanding the top of the sides and heel-block. The kerfing that will hold the back in place was next on the list.

One side all glued up.All those rings are just rubber-bands that spilled out of the clothespin holder.
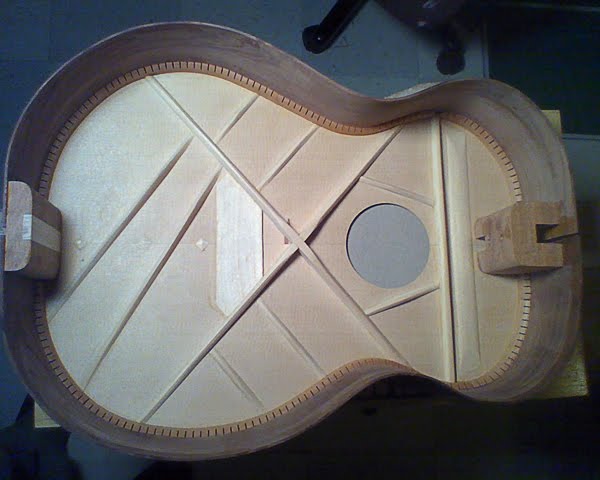
Photo this morning of all the kerfing done!

So the next step is gluing the back in place. I will most likely do this later this week or weekend. I will need to do a last go-over sanding anything that is left on the inside and fixing any glue squeeze-out. I've included the photo of the back and neck just to show how far we've come on this project. It is really getting close.

Tuesday, January 11, 2011

Trimming the Sides

Now that the sides are glued in place each needs to be shaped to fit the contour of the back of the guitar. The tail-block is 4" and the heel block is more shallow. I drew parallel lines from the tail-block to a location about 2" behind the waist – from there the sides will angle down to the heel-block. You can see the lines drawn on the sides in the photo below (heel block).
Almost all of this wood removal was done with this handy small plane. However I did use a chisel from time to time.

Getting close, I only removed about 1/8" in the back but had to remove almost a whole inch in the front.

Just a little further...
Once I was very close to each block, I used that sanding board (shelf) that has 80 grit sandpaper spray-mounted to it. This was VERY noisy, almost like a turkey call or fingers on a chalkboard. This will create two flat planes. I will round them off slightly, later after the kerfing is glued on.

I used sidewalk chalk to see where the sandpaper was hitting and where I needed to sand more...

Here the sides are sanded flush with the tail-block.


The heel-block is sanded almost to completion, but I had to stop. It was getting late and I'm sure my wife would appreciate me stopping all the noise. I will finish this up tonight – not much further to go. This photo gives you a pretty good idea what the contour will be...


I decided to start to chisel out the mortise for the neck joint. This makes way less noise. I stopped short of the soundboard – I didn't want to accidentally puncture it with the chisel. I think I will probably cut the rest with a fret saw or maybe the dremel.Can't wait to get back on it tonight!

Monday, January 10, 2011

Gluing the Sides On

After the kerfing was glued in place, I sanded the kerfing flush with the sides on a sanding board. The sanding board was simply a shelf with sandpaper spray-mounted to it.

Gluing the side to the tail-block. I used several clamps to get a lot of pressure.
Then I used a ton of clamps on the sides.
Not a great photo but this is the seam between the soundboard and the sides. The cardboard under the soundboard allows for the soundboard to keep it's bowed shape without breaking under the clamping pressure.


I had to cut grooves in the kerfing (with a chisel) to allow the braces to fit snug.

Top view after the sides are glued up. There is still a lot of over hang (the top over the sides) and the shape of the top isn't defined, but that will be fixed after the back is glued up.

A few photos of the guitar with the sides glued on.

The sides will need to be carved flush with the mortise of the heel-block (also flush with the top).
This is where the sides attach to the tail-block. I will place another light patch of wood here (Maple) after the back is glued on.
I'll have to check back, but I don't know if I mentioned the difficulties I had getting the sides to match. I ended up having to clamp one of the sides in place for several weeks to get it to remember it's shape. It was tough getting to this point and I was afraid of messing something up. It was difficult for me to "pull the trigger" and actually put glue down. I'm glad I did now. Excited to get to the next step tonight!